



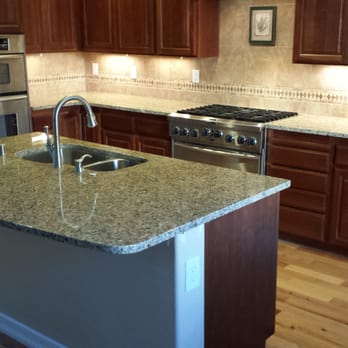
Installing a premium stone countertop is one of the final and most rewarding stages of a kitchen or bathroom project. By the time fabrication is complete, the marble, granite, quartz, or quartzite has been digitally templated, precision cut, polished, and quality checked. However, even the best-fabricated worktop can encounter delays or installation challenges if the site is not properly prepared. This is why countertop installation in Kenya begins long before fitting day itself.
Successful installation depends on more than simply delivering the stone. Cabinets must be fully installed, level, and securely fixed. Plumbing and electrical first-fix work should already be complete, while access routes must allow large stone sections to be safely moved into the property. Even relatively small oversights—such as unfinished cabinetry, blocked access, or missing appliance specifications—can delay installation or require expensive return visits.
Recommended Stone Solutions



Professional stone installers therefore carry out careful site assessments before fabrication begins. These assessments confirm measurements, structural support, appliance locations, and installation access, ensuring the countertop fits precisely on the scheduled fitting day.
Understanding countertop installation in Kenya helps homeowners, architects, contractors, and interior designers prepare their projects correctly, minimise delays, and protect their investment in premium stone surfaces.
At Maruti Mining Limited, every installation is supported by digital templating, professional site inspections, precision CNC fabrication, and experienced installation teams committed to delivering exceptional workmanship.
You can explore our complete collection of premium marble, granite, quartz, quartzite, and other architectural stone surfaces available through Maruti Mining Limited at marutimining.
Why Site Preparation Matters
Proper preparation ensures the installation proceeds safely, accurately, and efficiently.
A well-prepared site helps prevent:
- Installation delays
- Incorrect measurements
- Countertop damage
- Cabinet movement
- Costly return visits
Preparation is just as important as fabrication.
Step 1: Complete Cabinet Installation
The cabinets must be fully installed before digital templating takes place.
They should be:
- Permanently fixed
- Perfectly level
- Structurally sound
- Correctly aligned
- Free from movement
Stone worktops should never be measured on temporary cabinetry.
Step 2: Confirm Cabinet Levels
Even minor differences in cabinet height can affect the finished countertop.
Installers will typically check:
- Front-to-back level
- Side-to-side level
- Cabinet alignment
- Corner junctions
Any adjustments should be completed before fabrication begins.
Step 3: Finish First-Fix Plumbing
Plumbing rough-ins should already be completed.
This includes:
- Water supply lines
- Waste pipes
- Sink positioning
Final plumbing connections are normally completed after the countertop has been installed.
Step 4: Complete Electrical First Fix
Electrical preparation should include:
- Hob supply
- Socket wiring
- Appliance connections
- Lighting rough-ins
Having these services in place reduces installation interruptions.
Step 5: Confirm Appliance Models
Stone fabricators require the exact specifications for:
- Hobs
- Undermount sinks
- Drop-in sinks
- Taps
- Pop-up sockets
Manufacturer templates help ensure accurate CNC cut-outs.
Step 6: Prepare Access Routes
Stone slabs are heavy and often transported in large sections.
Before fitting day, check:
- Gate widths
- Door openings
- Staircases
- Lifts
- Corridors
- Parking availability
Safe access protects both the installers and the stone.
Step 7: Clear the Installation Area
The workspace should be free from unnecessary obstacles.
Remove:
- Furniture
- Boxes
- Building materials
- Loose tools
- Decorative items
A clear workspace allows installers to work safely and efficiently.
Step 8: Ensure Adequate Lighting
Good lighting helps installers:
- Inspect joints
- Align seams
- Check polishing
- Verify final finish
Natural daylight is helpful, but temporary site lighting can also be used if required.
Step 9: Confirm Structural Support
Before installation, verify that:
- Cabinets are fully supported
- Brackets are installed where required
- Substrates are complete
- Overhang supports are in place
Proper support protects the stone from unnecessary stress.
Step 10: Final Site Inspection
Professional installers usually complete one final inspection before fitting.
This confirms:
- Measurements
- Cabinet readiness
- Appliance positions
- Access conditions
- Site safety
Resolving issues at this stage helps ensure installation proceeds smoothly.
For additional guidance, you can also visit our Knowledge Base for expert insights at knowledge-base.
Step 11: Protect Finished Floors
Before the installation team arrives, protect completed flooring to minimise the risk of scratches or impact damage during material handling.
Protective measures may include:
- Heavy-duty floor protection sheets
- Cardboard or fibreboard walkways
- Corner protectors
- Dust sheets
- Protective coverings for finished stairs
Large stone slabs can weigh hundreds of kilograms, making floor protection an important part of site preparation.
Step 12: Ensure Someone Is Available on Installation Day
A responsible person should be present throughout the installation.
They can:
- Provide site access
- Confirm countertop layout
- Answer installation questions
- Approve sink and hob positioning
- Review the finished work before the team leaves
This helps prevent misunderstandings and avoids delays.
Step 13: Check Environmental Conditions
Stone installation should take place in a stable environment.
Before fitting day, ensure:
- The building is weather-tight
- Major plastering is complete
- Painting around the worktop area is finished where possible
- Excess moisture has been controlled
- Construction debris has been removed
A clean, dry environment improves both installation quality and adhesive performance.
Step 14: Plan for Heavy Lifting
Stone worktops are heavy and require safe handling.
Professional installers will assess:
- Carrying distances
- Door widths
- Turning spaces
- Stair access
- Lift capacity
- Safe lifting positions
In some cases, specialist lifting equipment or additional installers may be required.
Step 15: Delay Final Decorating Near the Worktop
Although professional installers work carefully, it is often advisable to complete the final decorating after the countertop has been installed.
This allows for:
- Minor wall adjustments
- Silicone sealing
- Splashback fitting
- Final paint touch-ups
The result is a cleaner, more professional finish.
What Happens on Installation Day?
A typical countertop installation in Kenya follows a structured process.
The installation team will usually:
- Inspect the site and cabinets.
- Carefully unload and position the stone.
- Dry-fit each section to confirm alignment.
- Bond seams using colour-matched adhesives where required.
- Install sinks, hob cut-outs, and support components.
- Complete final polishing and sealing where applicable.
- Inspect the finished installation with the client.
The exact sequence varies depending on the size and complexity of the project.
Common Reasons Installations Are Delayed
Many delays are avoidable with proper preparation.
Typical causes include:
- Cabinets that are not level
- Incorrect appliance specifications
- Incomplete plumbing or electrical work
- Restricted access to the property
- Unfinished flooring or walls
- Last-minute design changes
- Missing support brackets
Preparing the site in advance helps keep the installation on schedule.
A Simple Pre-Installation Checklist
Before confirming your installation date, ensure that you can answer yes to each of the following:
- Cabinets are fully installed and level.
- Plumbing and electrical first-fix work is complete.
- Appliance models have been confirmed.
- Sink and hob templates have been supplied.
- Access routes are clear.
- Floors are protected.
- Installation area is free of obstructions.
- Support brackets have been installed where required.
- Someone will be available to receive the installation team.
Completing this checklist helps ensure a smooth and efficient installation.
Questions to Ask Before Installation
Before fitting day, ask your supplier:
- Has the final site inspection been completed?
- Are the cabinets ready for installation?
- Have appliance templates been approved?
- Will the installers provide seam finishing on site?
- How long will the installation take?
- When can plumbing and electrical connections be completed after fitting?
Clear communication before installation helps avoid unnecessary delays and ensures everyone understands the project timeline.
Clients can also learn more about premium marble collections at marble-manufacturer-kenya, explore our granite range at top-granite-manufacturer-kenya-maruti-mining, discover engineered quartz surfaces at quartz-stone, or browse our completed stone installations at our-works.




Leave a Reply